How to Download Part of YouTube Videos [4 Working Ways]
By Nicola Begmann
Updated on Jul 07, 2025
21.5K views
5-min read
Sometimes, you only need to download a specific part of YouTube videos instead of the full ones, whether it’s to save a favorite scene, share a memorable moment with friends, or enhance a presentation with a YouTube clip. Knowing how to download video segments in a compatible MP4 format can be incredibly useful.
In this blog, we’ll show you how to easily download parts of YouTube videos in high quality effectively with or without third-party programs installation. Keep reading to discover the best tools and techniques to save your favorite YouTube moments effortlessly!
1. Download Part of YouTube Video in Original Quality
When there are very few YouTube downloaders that can directly download part of YouTube video directly, selecting an efficient one to quickly save the complete YouTube videos offline and then trim them to keep the parts you need can even be a much quicker way. For such circumstances, TuneFab VideOne YouTube Downloader is highly recommended.
TuneFab VideOne YouTube Downloader is rated as a professional YouTube downloader on both Windows PC and Mac devices, delivering pretty quick performance to batch download YouTube videos offline within seconds. With the help of this great program, it can only take you a very short moment to save YouTube videos offline first, and then trim the parts to keep the moments you like independently.
TuneFab VideOne YouTube Downloader is developed with advanced video decoding and encoding techniques, which can keep up to 4K resolution to save YouTube videos as regular video files offline, with universally supported formats like MP4, MKV, and MOV for you to select. This delivers the greatest compatibility on almost all mainstream video players. Once you have your lossless videos, you can easily extract specific segments using the built-in video editor on Windows/macOS.
Key Features of TuneFab VideOne YouTube Downloader
- Save any YouTube video including singles, playlists, channels, and more to your device, even without subscribing to YouTube Premium
- Retain original audio and subtitles with multilingual options
- Grab YouTube videos with soft, hard, or external subtitles
- Download YouTube videos in batches at speeds up to 3X faster
- A built-in web player for smart search and to simplify your downloading process
Download YouTube Video to MP4
In the following, please also walk through the manipulation guide and try using TuneFab VideOne YouTube Downloader to batch download YouTube videos to MP4 before cutting parts from them:
Step 1. Download and install TuneFab VideOne Downloader on your device (Windows/macOS). Launch it, select the “YouTube” icon, and log in to the web player with your YouTube account.
Also, if you don’t want to log in to it, you can copy the link of the video you want to download, paste it to the search box, and hit enter.
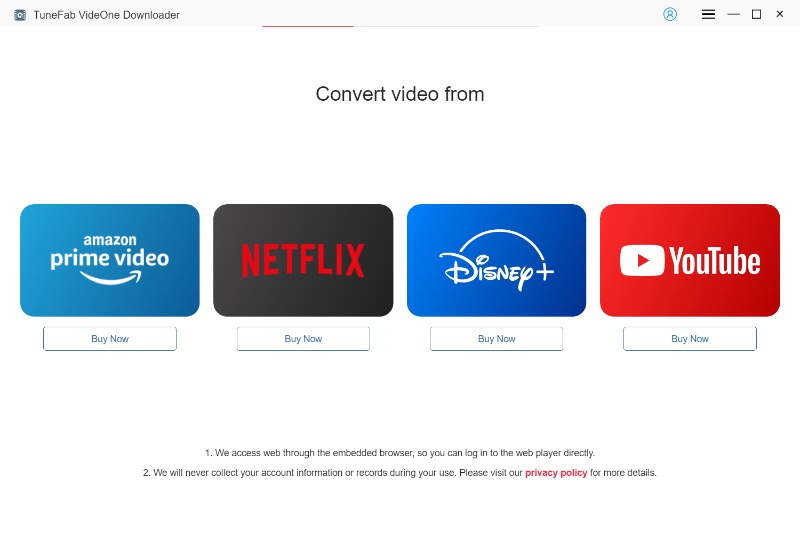
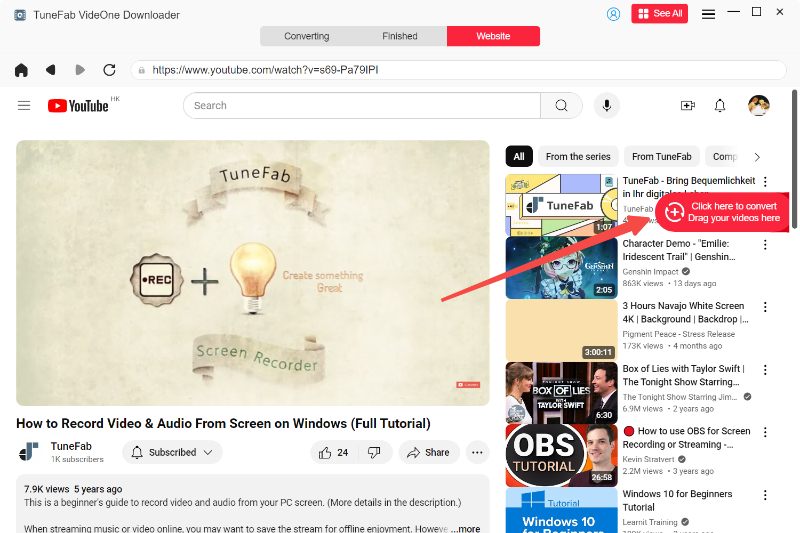
Optional Step. After logging in to YouTube, find the video you want to download. Then hit the download button next to the address bar.
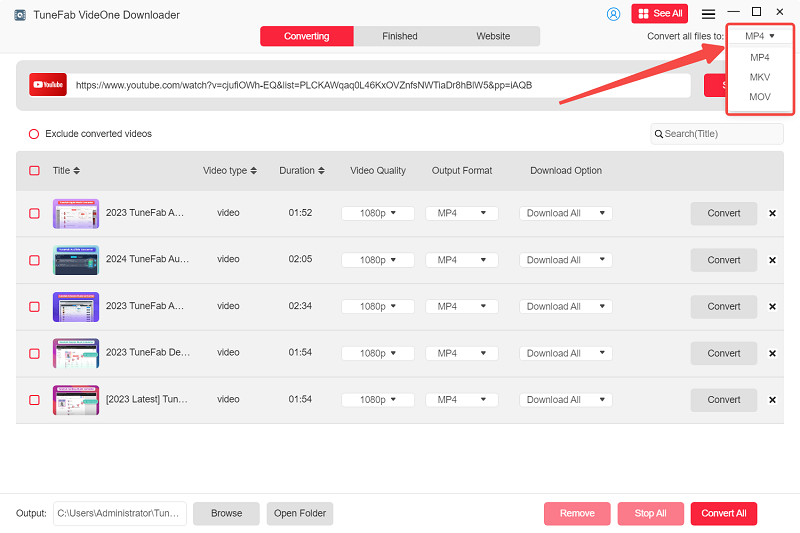
Step 2. On the pop-up window, you can customize video format, quality, download options, audio/subtitle language, and more output parameters.
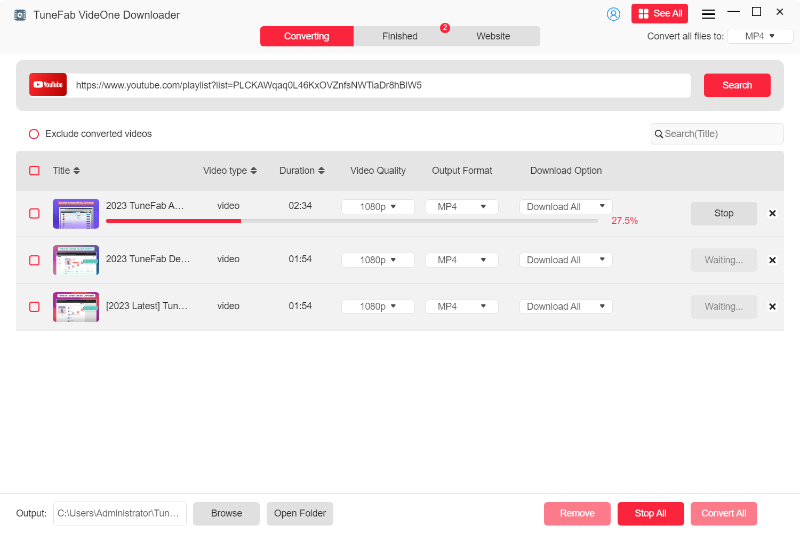
Step 3. Select the video and click the “Download” button, and TuneFab VideoOne will start downloading the added movies. When it finishes, you can locate the video files by going to the “Downloaded” column and clicking “View Output File” next to each finished title.
Trim YouTube Video
Once the YouTube video is downloaded, you are able to trim it and save parts of the YouTube video in your preference. Here’s how to trim YouTube videos easily on Windows/Mac.
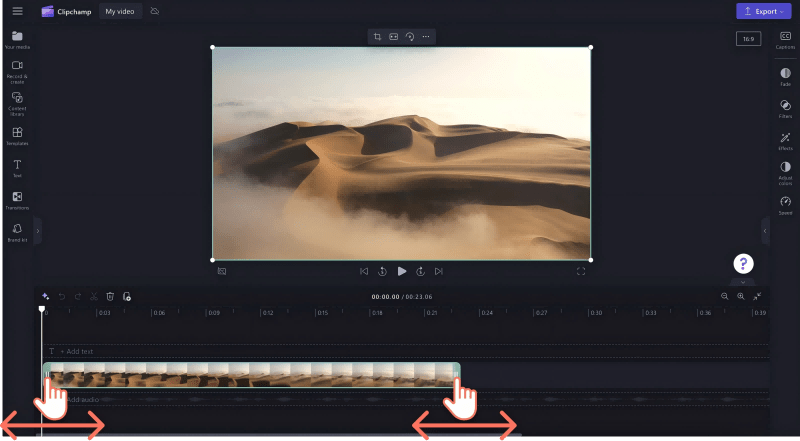
Trim YouTube Videos with Clipchamp on Windows
NOTE: On Windows 11, you are able to use the built-in program, Clipchamp to trim downloaded YouTube videos directly. On Windows 10 or former systems, you need to install it separately from the Windows app store.
Step 1. Open Clipchamp and sign in. Click “Create a new video” and then “Import media” to upload the video you want to trim.
Step 2. Drag the video to the timeline. Move the playhead to the point where you want the trim to start and end, then click the Split button (scissors icon) or press S on your keyboard.
Step 3. After trimming, click the Export button in the top right corner, choose the resolution, and export the trimmed video to your computer.
Trim YouTube Video Clips in iMovie on Mac
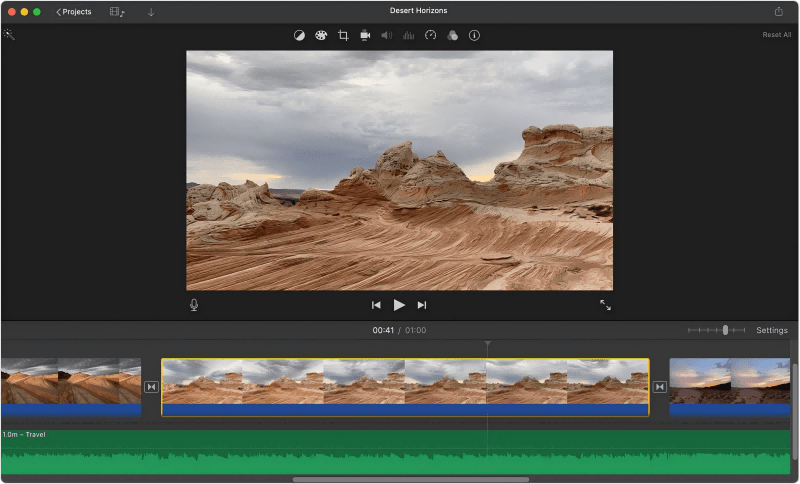
Step 1. Open iMovie, and click “Create New > Movie > Import Media” to choose the YouTube video part you want to trim from your computer.
Step 2. Drag the videos to the timeline, and use Command + B to cut the videos from where you want them to start and end. Then, you can select and delete the unwanted portion.
Step 3. Once the trimming is done, click the export icon in the top right, choose “File”, set your desired export format, and click “Next” to save the trimmed video.
2. Download YouTube Video Clip Online
While professional YouTube downloaders offer the highest video quality, those who only need to cut YouTube videos occasionally may not want to install additional software. Fortunately, there’s a simple alternative: an online YouTube video cutter.
Among so many online YouTube video cutters, SliceTube stands out for its compatibility and ad-free features. It’s free to use on modern browsers, downloading and cutting parts of YouTube videos online, and saving them to MP4 on any device with just a few clicks. This method is straightforward and requires no technical expertise.
Note: Free users of SliceTube are limited to 360P video quality, and the downloaded clips may have audio-video sync issues, with occasional sound loss. To download YouTube clips of high quality, reliable tools like TuneFab VideOne YouTube Downloader perform better.
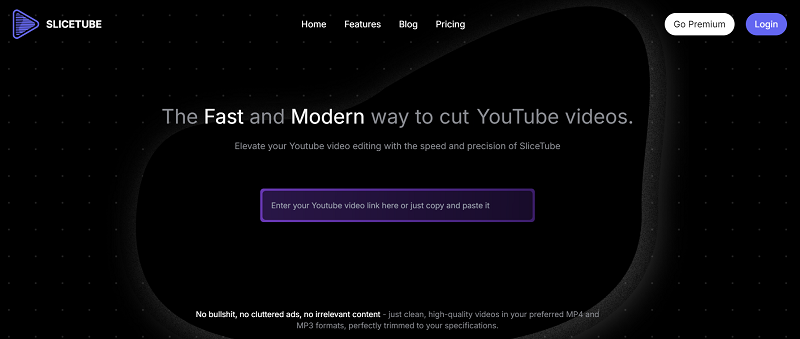
Step 1. Launch a browser on your device, go to the homepage of SlicTube, and input the YouTube video URL into the search bar.
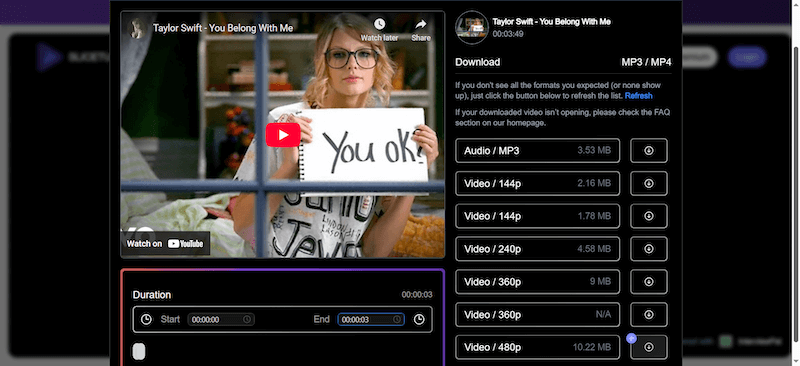
Step 2. After SliceTube finishes parsing the video, you can personalize the starting and ending points to determine the duration of the YouTube video part you’d like to clip under the video playback window. Then, confirm it by clicking “Apply”.
Step 3. When the duration is selected, select the format/quality on the right side of the interface in your preference. Finally, tap the “Download” button and the YouTube video clip will be downloaded partially.
3. Download Part of YouTube Video with Github Tool
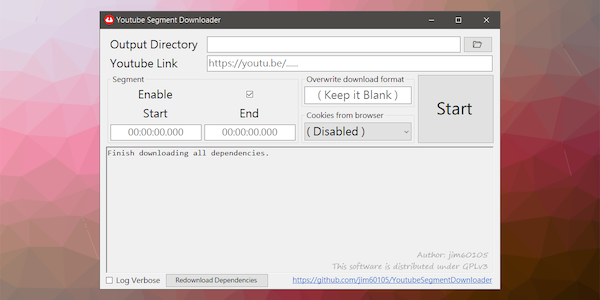
On GitHub, you can also discover some free tools working for YouTube video downloading. YouTube Segment Downloader is freeware delivering a cost-free service to help download part of YouTube videos in an effortless way.
It is designed with a classic but intuitive interface, making it clear for even beginners to master manipulation easily. Once you install this YouTube ripper on your desktop, you can follow the procedures below to save partial YouTube videos with only a few clicks. Here’s how it works:
Step 1. After installing YouTube Segment Downloader, run the program and directly input the YouTube video link to the downloading bar displayed on the main feed.
Step 2. Enter the starting and ending moments you’d like to trim the YouTube video.
Step 3. Simply tap the Start button and the YouTube video clip will be downloaded to the local folder in no time.
4. Rip and Trim YouTube Clips via Screen Recorder
Of course, if the YouTube part you need to save independently is short and you don’t have high-quality requirements, directly screen-recording YouTube videos is also a good option.
Compared to online recording tools, FonePaw Screen Recorder can capture high-quality videos from YouTube. Whether you want videos in GIF, MP4, MOV, or more, it will meet your requirements. Besides, it supports scheduled recording, you do not need to sit before your device till it finishes recording. With it, you can feel free to record YouTube videos or YouTube Live Streams for hours, without worrying about the time limits.
Let’s explore how you can capture and trim YouTube clips with it.
Step 1. Download, install, and launch FonePaw Screen Recorder on your computer. Play the video that you want to record on YouTube, then enter the “Video Recorder” on FonePaw.

Step 2. When a rectangle of blue dotted lines and a floating control panel appear, click the arrow-cross icon in the center, and drag it over the YouTube playback screen. Then, adjust the area till it best fits the playback screen.
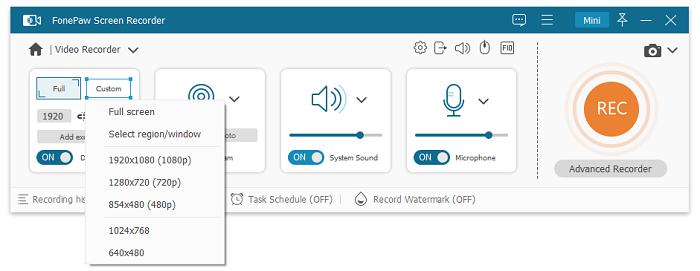
Step 3. Turn on “System Sound” and click the “REC” button to start recording.
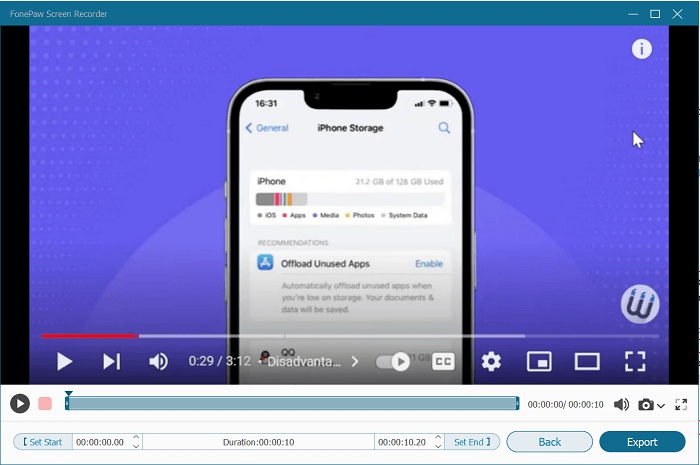
Step 4. Click the red square button to stop recording. Before exporting the recorded video to a local folder, you can preview and trim it by setting the starting and end points on the toolbar at the bottom.
Bonus Tip: Generate 1-Minute YouTube Clip Link for Sharing
Now, YouTube is equipped with the clipping function, which allows audiences to directly generate a 1-minute video clip for sharing with friends to watch the highlighted moments together conveniently.
The manipulation is easy to master. Simply follow the guidance below to get the link for the clipped YouTube video and share it with your friends!
Step 1. Open a YouTube video. Please tap the three-dots button and select the Clip feature.
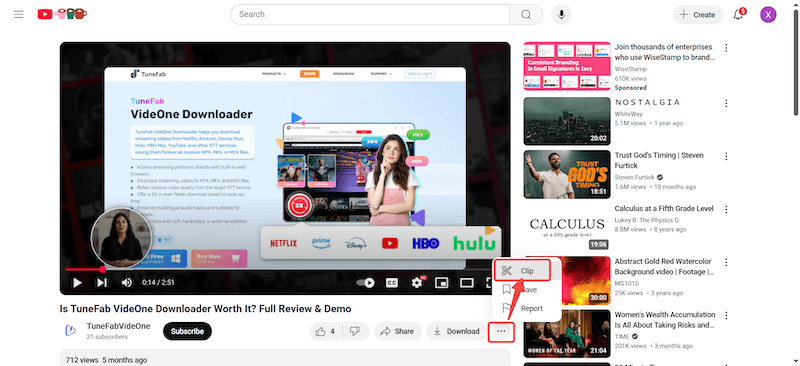
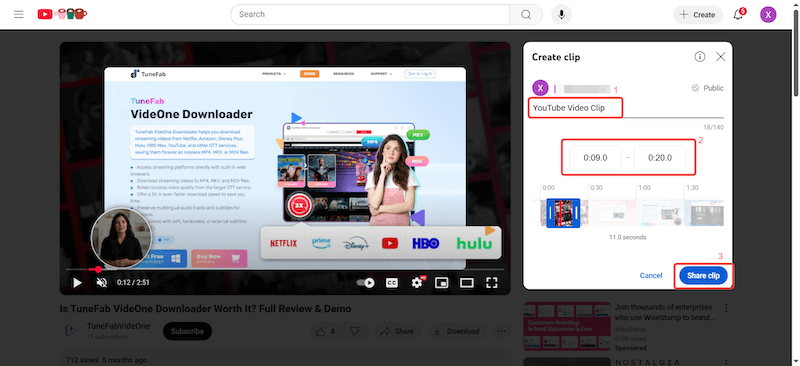
Step 2. In the pop-up Create Clip window, enter the starting and ending points you want to clip. Tap Share Clip to generate a link.
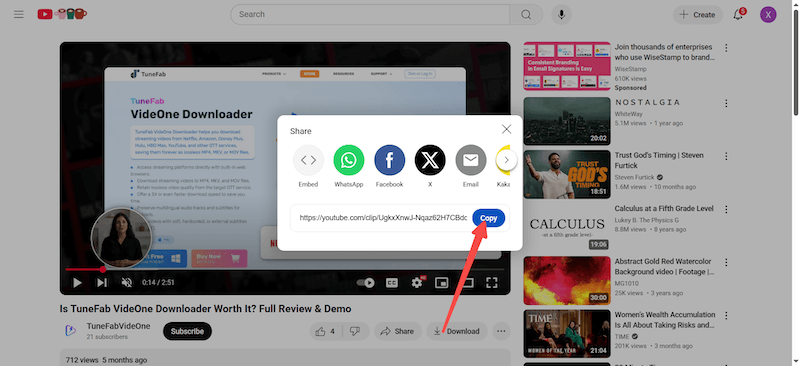
Step 3. When the clipped video link is created, tap Copy, and the link will be in your clipboard. Now you can share it with your friends! Once he/she opens the link, the YouTube video will start playing from the starting point you manually set!
Attention: It is noted that this generated clipped YouTube video link can’t be phrased by most YouTube video downloaders. So far, the only tool we’ve found that can directly download is YoutubeSegmentDownloader.
Which Is the Method to Download Part of YouTube Video?
After walking through the details of these 4 methods to download part of YouTube videos, the chart below will compare them to help you better select the appropriate solution to try. Please check:
| Methods | Best For | Download Format | Download Quality | Downloading Speed | Easy to Use |
|---|---|---|---|---|---|
| TuneFab VideOne YouTube Downloader | Batch downloading YouTube videos for offline clipping | MP4, MOV, MKV | Up to 4K | Fast | Yes |
| Online YouTube Clip Cutter | Directly clip YouTube videos online without third-party programs | MP4 | Up to 360P | Medium | Yes |
| GitHub Tool | Smooth and speedy performance to save part of YouTube videos on computers | MP4 | Up to 720P | Medium | Yes |
| Screen Recorder | Flexibly save YouTube video clips at any duration | MP4, GIF, MOV | Up to 1080P | Slow | Yes |
Final Words
Downloading part of YouTube videos is easy with the four methods we’ve outlined. For freely resolving this requirement, the GitHub tool can save your budget. In addition, online cutters like SliceTube quickly trim single YouTube videos, while FonePaw Screen Recorder offers flexibility in recording YouTube videos of any duration as you wish. However, both may compromise video quality.
For the best results, we recommend TuneFab VideOne YouTube Downloader. It supports up to 4K quality in MP4/MKV/MOV formats, lets you customize output parameters, and ensures efficient downloads. With lossless quality, you can trim without sacrificing clarity. Download it now and enjoy high-quality clips tailored to your needs!
